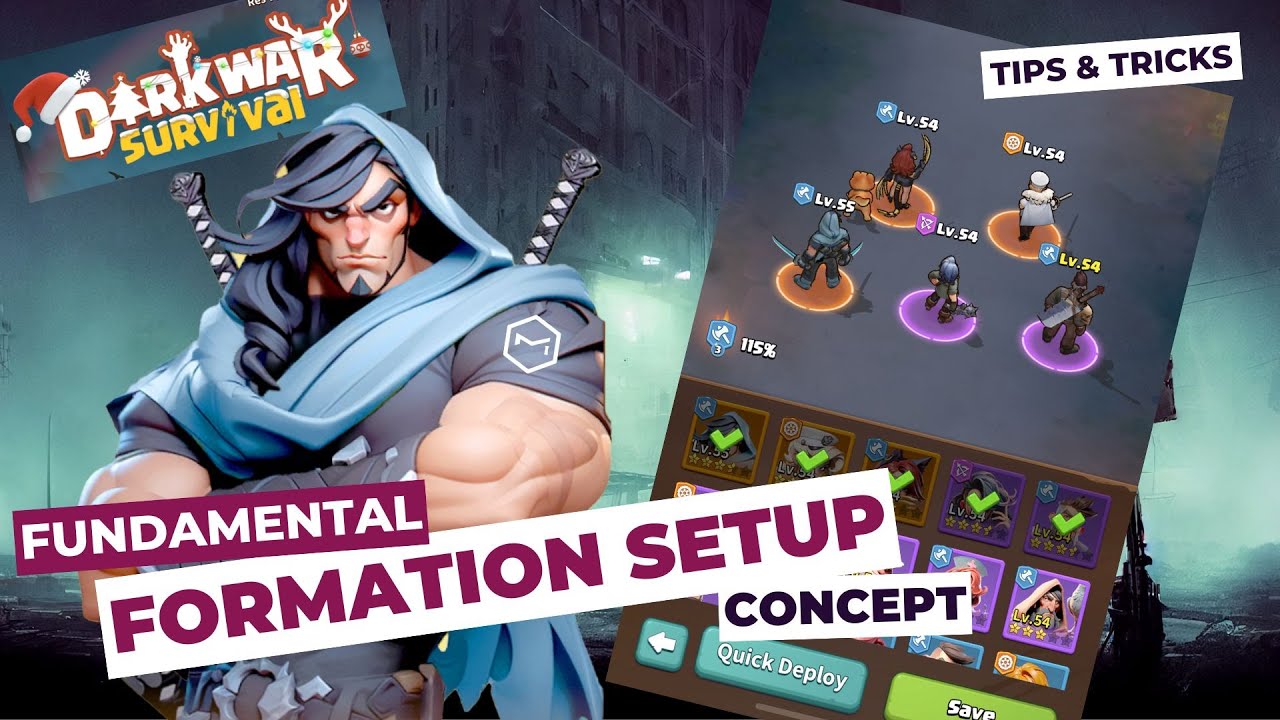
In Dark War Survival, mastering the art of formation setup can be the difference between crushing victories and devastating defeats. We have observed that many players overlook this crucial aspect of gameplay, often placing heroes haphazardly without strategic consideration. This chapter aims to establish a solid foundation for understanding formation mechanics and their impact on battle outcomes.
The Fundamentals of Formation Strategy
Formation setup is not merely about placing your strongest heroes on the battlefield; it requires thoughtful consideration of multiple factors that work in harmony. When an opponent fails to set their formation correctly—such as positioning vulnerable damage dealers in the front row—they create exploitable weaknesses that can be quickly capitalized upon. These tactical errors often lead to the premature elimination of key units and a significant reduction in their overall damage output.
Common Formation Mistakes to Avoid
Throughout our analysis of countless battles, we have identified several recurring mistakes that undermine otherwise strong teams:
Placing high-damage, low-health heroes in exposed positions
Ignoring protective synergies between front and back-line units
Failing to account for enemy attack patterns and targeting priorities
Overlooking the spatial relationship between heroes with complementary abilities
Formation as a Dynamic System
It is essential to understand that formation setup is not a static decision but rather a dynamic system that should evolve with your roster development and in response to different challenges. This article will guide you through the process of creating adaptable formations that can be adjusted for various combat scenarios.
The Three Pillars of Effective Formations
Effective formations in Dark War Survival rest upon three fundamental pillars that will be explored in depth throughout this article:
Faction synergies that provide powerful team-wide bonuses
Hero role distribution that ensures balanced offensive and defensive capabilities
Strategic positioning that maximizes each hero's strengths while minimizing vulnerabilities
By mastering these three pillars, we can develop formations that not only survive the dark war but dominate it. In the following chapters, we will delve deeper into each of these elements, beginning with faction bonuses and their critical role in enhancing your team's combat effectiveness.
Faction Bonus: Maximizing Combat Effectiveness
Building upon our discussion of formation fundamentals, we now turn our attention to one of the most powerful mechanics in Dark War Survival: faction bonuses. These synergistic effects can dramatically amplify your team's combat potential when properly leveraged.
Understanding Faction Synergy Mechanics
Faction bonuses represent one of the most significant multipliers available to players in Dark War Survival. When we incorporate multiple heroes from the same faction into our formation, we unlock substantial statistical advantages that can turn the tide of battle. The system operates on a tiered structure, with increasing benefits as more same-faction heroes are deployed together.
The mathematics behind these bonuses is compelling:
Three heroes from the same faction: 115% increase to attack and defense
Four heroes from the same faction: 125% increase to attack and defense
Five heroes from the same faction: 135% increase to attack and defense
These percentage increases apply to all qualifying heroes, creating a multiplicative effect that scales impressively as your team develops. For example, when fielding heroes like Guy, Catherine, Rex, and Barnett from the same faction, their collective combat effectiveness grows exponentially compared to a formation with mixed factions.
Strategic Implementation of Faction Bonuses
Our primary recommendation when constructing formations is to prioritize achieving at least the three-hero faction bonus. This 15% boost to both offensive and defensive capabilities provides an immediate tactical advantage that should not be overlooked. This bonus effectively transforms your heroes into significantly more powerful versions of themselves without requiring additional resources or upgrades.
However, we must balance this pursuit with practical considerations. While the 25% or 35% bonuses from four or five same-faction heroes might seem irresistible, they present diminishing returns if implemented prematurely or at the expense of overall team quality.
Balancing Faction Purity with Equipment Quality
The pursuit of faction purity introduces an important strategic consideration: equipment distribution. In the resource-constrained environment of Dark War Survival, particularly for players who limit their financial investment, acquiring high-quality equipment for five heroes of the same faction can prove challenging.
We recommend a pragmatic approach to this dilemma:
In early to mid-game stages, prioritize the three-hero faction bonus while incorporating well-equipped heroes from other factions to round out your formation
Reserve the pursuit of four or five-hero faction bonuses for later game stages when you have accumulated sufficient resources to properly equip these specialized formations
Consider maintaining multiple formations with different faction focuses to address various combat scenarios
Hybrid Faction Strategies
For players with diverse hero collections, hybrid faction strategies offer compelling alternatives. Rather than diluting your formation's effectiveness with poorly equipped same-faction heroes, consider these approaches:
Dual Faction Core: Build around two sets of three-hero faction bonuses (requiring at least one hero that belongs to both factions)
Primary/Secondary Structure: Implement a primary three-hero faction core supplemented by a secondary two-hero faction pairing
Strategic Singleton: Include a particularly powerful hero with no faction synergy if their individual contribution outweighs the potential bonus from a weaker same-faction alternative
Faction Selection Considerations
Not all factions are created equal in Dark War Survival. When determining which faction to build around, we should evaluate:
The overall power ceiling of available heroes within each faction
The complementary nature of hero roles within the faction (balanced distribution of tanks, damage dealers, and support)
The accessibility of faction heroes through various acquisition methods
The synergy between faction-specific abilities and mechanics
By thoughtfully implementing faction bonuses while maintaining a balanced approach to team composition, we can maximize our combat effectiveness without sacrificing versatility. In the next chapter, we will explore how understanding hero roles—tankers, strikers, and hybrids—further enhances our ability to create optimized formations.
Hero Roles: Understanding Tankers, Strikers, and Hybrids
Having established the importance of formation fundamentals and faction bonuses in our previous chapters, we now turn our attention to a critical aspect of team composition: hero roles. Understanding the distinct characteristics and optimal deployment of Tankers, Strikers, and Hybrids is essential for creating balanced and effective formations in Dark War Survival.
The Three Fundamental Hero Roles
In our analysis of Dark War Survival's combat system, we have identified three primary hero archetypes that form the backbone of any successful formation. While these classifications are not explicitly labeled within the game itself, they provide a useful framework for strategic decision-making:
Tankers: Heroes with high defensive capabilities and health pools
Strikers: Heroes with superior damage output but limited survivability
Hybrids: Heroes with balanced offensive and defensive attributes
This role-based approach to hero classification allows us to make informed decisions about positioning and team composition that complement the faction bonuses discussed in the previous chapter.
Tankers: The Frontline Defenders
Tankers serve as the protective wall between enemy forces and your more vulnerable heroes. Exemplified by champions like Quinn, Catherine, Rex, and Eddie, these heroes possess significantly higher defense statistics and health pools compared to their offensive capabilities. Their primary function is to absorb enemy attacks while providing time for your damage dealers to eliminate threats.
The defining characteristics of effective Tankers include:
Substantial health pools that allow them to withstand concentrated enemy fire
Higher defense ratings that reduce incoming damage
Defensive skills such as shields, damage reduction, or self-healing
Crowd control abilities that disrupt enemy formations and attack patterns
When integrating Tankers into our formations, their placement in the front row is non-negotiable. This positioning leverages their durability while shielding more vulnerable heroes from direct assault. A common mistake we observe among less experienced players is the undervaluation of Tankers, leading to formations that lack sufficient defensive capability and quickly collapse under pressure.
Strikers: The Damage Specialists
Strikers represent the offensive powerhouse of any formation. Heroes such as Gaius, Cecilia, and Scarlet exemplify this role with their exceptional damage output and specialized offensive abilities. These heroes typically feature significantly higher attack ratings at the expense of defensive capabilities.
The key attributes that define effective Strikers include:
Superior attack statistics that enable rapid elimination of enemy units
Special abilities focused on damage amplification
Critical hit potential that can turn the tide of battle in crucial moments
Area-of-effect attacks that can damage multiple opponents simultaneously
The positioning of Strikers requires careful consideration. Their placement in the back row is essential to maximize their battlefield longevity and, by extension, their total damage contribution. When improperly positioned in the front line, these heroes typically fall before realizing their damage potential, effectively wasting their offensive capabilities. This represents one of the most common and costly formation errors we encounter in our analysis of player strategies.
Hybrids: The Versatile Specialists
Hybrid heroes occupy a unique and valuable position in the role spectrum, offering balanced offensive and defensive capabilities. These versatile units can adapt to various battlefield conditions and often bring specialized utility skills that enhance overall team performance.
The distinguishing features of effective Hybrid heroes include:
Balanced attack and defense statistics that allow for flexible positioning
Utility abilities that support both offensive and defensive strategies
Self-sustaining mechanics that reduce their reliance on dedicated Tankers
Complementary skills that enhance the effectiveness of specialized teammates
The strategic deployment of Hybrid heroes provides formation flexibility that pure Tankers or Strikers cannot match. They can serve as secondary Tankers when positioned in the front row or as supporting damage dealers in the back line. This versatility allows for adaptive formation strategies that can be adjusted to counter specific enemy compositions.
Role Distribution and Formation Balance
The optimal distribution of hero roles within a formation depends on several factors, including the specific content being challenged and the development level of available heroes. However, we have identified several principles that consistently produce effective results:
Maintain a minimum of two dedicated Tankers in most formations
Ensure at least one high-output Striker is protected in the back line
Use Hybrid heroes to address specific weaknesses in your formation
Consider the synergy between hero abilities when determining role distribution
A common misconception is that maximizing damage output by fielding multiple Strikers leads to optimal performance. Our analysis indicates that this approach frequently results in premature formation collapse, as the lack of adequate protection allows enemy forces to quickly eliminate key damage dealers.
Role Synergy and Complementary Abilities
Beyond the basic role distribution, we must consider how different hero roles interact with and complement each other. Certain combinations create powerful synergistic effects that exceed the sum of their individual contributions:
Tankers with taunt abilities paired with fragile, high-damage Strikers
Hybrid heroes with healing capabilities supporting durable Tankers
Strikers with complementary damage types (physical and magical) to overcome varied enemy defenses
Tankers with crowd control abilities creating opportunities for Strikers to maximize damage output
These role-based synergies, when combined with the faction bonuses discussed in the previous chapter, create the foundation for truly formidable formations.
Adapting Role Distribution to Game Progression
As we progress through Dark War Survival, the optimal role distribution evolves in response to changing challenges and hero availability. In the early game, Hybrid heroes often provide the best value due to their versatility and self-sufficiency. As our roster expands, we can transition toward more specialized role distributions that maximize the unique strengths of dedicated Tankers and Strikers.
In the next chapter, we will build upon this understanding of hero roles to explore the nuanced art of strategic positioning—the final piece in our formation mastery puzzle. By combining our knowledge of formation fundamentals, faction bonuses, and hero roles with optimal positioning strategies, we will develop formations capable of overcoming even the most challenging content in Dark War Survival.
Strategic Positioning: Optimizing Your Battle Formation
Building upon our comprehensive understanding of formation fundamentals, faction bonuses, and hero roles, we now arrive at the culmination of our formation strategy: the precise art of strategic positioning. This critical element transforms a collection of powerful heroes into a cohesive fighting force capable of overcoming even the most formidable opponents in Dark War Survival.
The Science of Positional Advantage
Strategic positioning represents the practical application of all the principles we have discussed throughout this article. While understanding hero roles and faction bonuses provides the theoretical foundation, the specific placement of each hero within your formation determines how effectively these advantages translate into battlefield success.
Our analysis reveals that even minor adjustments to hero positions can dramatically alter battle outcomes. This is because positioning affects not only which heroes receive enemy attacks first but also influences ability targeting, area effect coverage, and protective synergies between units.
Front Row Optimization
The front row serves as your formation's first line of defense and requires careful consideration to maximize survivability and tactical advantage:
Prioritize placing Tankers in the front row positions to leverage their superior defensive capabilities and health pools
Position Tankers with taunt abilities in central front row positions to maximize their ability to draw enemy attacks away from vulnerable units
Consider the placement of Hybrid heroes with moderate defensive capabilities as secondary Tankers when necessary
Arrange front row heroes to create protective coverage for back row units, particularly those with exceptional damage output
The common mistake of positioning high-damage Strikers in the front row significantly undermines formation effectiveness. When heroes like Gaius, Cecilia, or Scarlet are placed in forward positions, they typically fall before realizing their damage potential, effectively wasting their offensive capabilities. Our testing consistently demonstrates that Strikers deployed in the front row often contribute less than half the damage they would achieve from protected back row positions.
Back Row Optimization
The back row configuration determines your formation's offensive output and requires strategic arrangement to maximize damage while maintaining protection:
Position primary damage dealers (Strikers) in back row positions that receive the most protection from front row Tankers
Arrange support heroes with healing or buffing abilities to maximize the coverage of their beneficial effects
Consider the attack patterns and targeting preferences of enemy formations when determining specific back row positions
Place heroes with area-of-effect abilities in positions that optimize their coverage of enemy formations
We have observed that many players underestimate the importance of specific back row positioning, assuming that any back row placement provides equal protection. However, our analysis indicates that certain back row positions receive significantly more protection than others, depending on the configuration of front row units and enemy targeting patterns.
Positional Synergy Between Heroes
Beyond the basic front/back row considerations, we must account for the positional relationships between heroes with complementary abilities:
Position heroes with protective abilities adjacent to vulnerable high-value targets
Arrange heroes with chain or adjacent-targeting abilities to maximize their effect coverage
Consider the activation sequence of abilities when determining hero placement
Position heroes with counter-attack abilities in locations likely to receive enemy attacks
These positional synergies create multiplicative effects that significantly enhance overall formation performance. For example, placing a Tanker with a protective shield ability adjacent to a high-damage Striker creates a defensive pocket that allows the Striker to operate with reduced risk.
Adapting Positions to Counter Enemy Formations
One of the most sophisticated aspects of strategic positioning involves adapting your formation to counter specific enemy configurations. This reactive positioning strategy requires:
Analyzing enemy formation patterns to identify their primary damage sources
Repositioning your Tankers to intercept enemy attack patterns
Adjusting your Striker positions to target enemy vulnerabilities
Modifying support hero placement to counter enemy control effects
This adaptive approach is particularly valuable in competitive PvP scenarios and challenging PvE content where standard formations may prove insufficient. By studying enemy formations and making targeted positional adjustments, we can create counter-formations that exploit specific weaknesses.
Position Rotation Strategies
In certain scenarios, implementing position rotation strategies can provide tactical advantages:
Periodically rotating Tankers between different front row positions to distribute damage more evenly
Temporarily moving a Hybrid hero to the front row to absorb a predictable burst of enemy damage
Adjusting Striker positions to target specific enemy threats as they emerge
Repositioning support heroes to counter evolving battlefield conditions
These dynamic positioning strategies require more active management but can provide significant advantages in extended combat scenarios where battlefield conditions evolve over time.
Formation Templates for Common Scenarios
While each player's hero roster and development level will dictate specific formation choices, we have identified several positional templates that consistently perform well across various content types:
The Fortress Formation: Three Tankers in the front row providing maximum protection for two high-damage Strikers in the back row
The Balanced Formation: Two Tankers and one Hybrid in the front row supporting one Striker and one support hero in the back row
The Offensive Formation: Two Tankers in the front row with three damage-focused heroes in the back row (suitable only for scenarios where rapid elimination of enemies is possible)
The Survival Formation: Two Tankers and one healing-capable Hybrid in the front row with one Striker and one support hero in the back row (optimized for extended battles)
These templates provide starting points that can be refined based on specific hero availability, faction considerations, and the particular challenges being faced.
Integrating All Formation Elements
The true mastery of formation strategy emerges when we successfully integrate all the elements discussed throughout this article:
Leveraging faction bonuses to enhance overall team performance
Distributing hero roles to create balanced offensive and defensive capabilities
Implementing strategic positioning to maximize each hero's contribution
Adapting formations to counter specific challenges and enemy configurations
This holistic approach to formation design elevates our strategic capabilities beyond simple power metrics and allows us to overcome challenges that might otherwise seem insurmountable based on raw statistical comparisons.
By applying these advanced positioning principles in conjunction with our understanding of formation fundamentals, faction bonuses, and hero roles, we can create optimized battle formations capable of dominating in Dark War Survival. Remember that formation mastery is an ongoing process that evolves with your hero roster and the challenges you face—continue to refine your approach as you progress through the game.
Why Lootbar.gg is the best choice for Last War Survival Top-up?
Looking to enhance your Last War Survival experience? Top up Last War Survival on lootbar.gg for an unparalleled gaming advantage! This trusted trading platform offers lightning-fast delivery of Hot Packages and in-game currency, ensuring you're always battle-ready when facing opponents. With competitive pricing, secure payment methods, and 24/7 customer support, lootbar.gg makes Last War Survival top uptransactions effortless and worry-free. Whether you're a casual player or hardcore survivor, their streamlined process gets you back to the action within minutes instead of hours. Join thousands of satisfied players who rely on this professional gaming marketplace to maintain their competitive edge in Last War Survival's challenging post-apocalyptic world.
 Building upon our discussion of formation fundamentals, we now turn our attention to one of the most powerful mechanics in Dark War Survival: faction bonuses. These synergistic effects can dramatically amplify your team's combat potential when properly leveraged.